Manage Project
Project Details
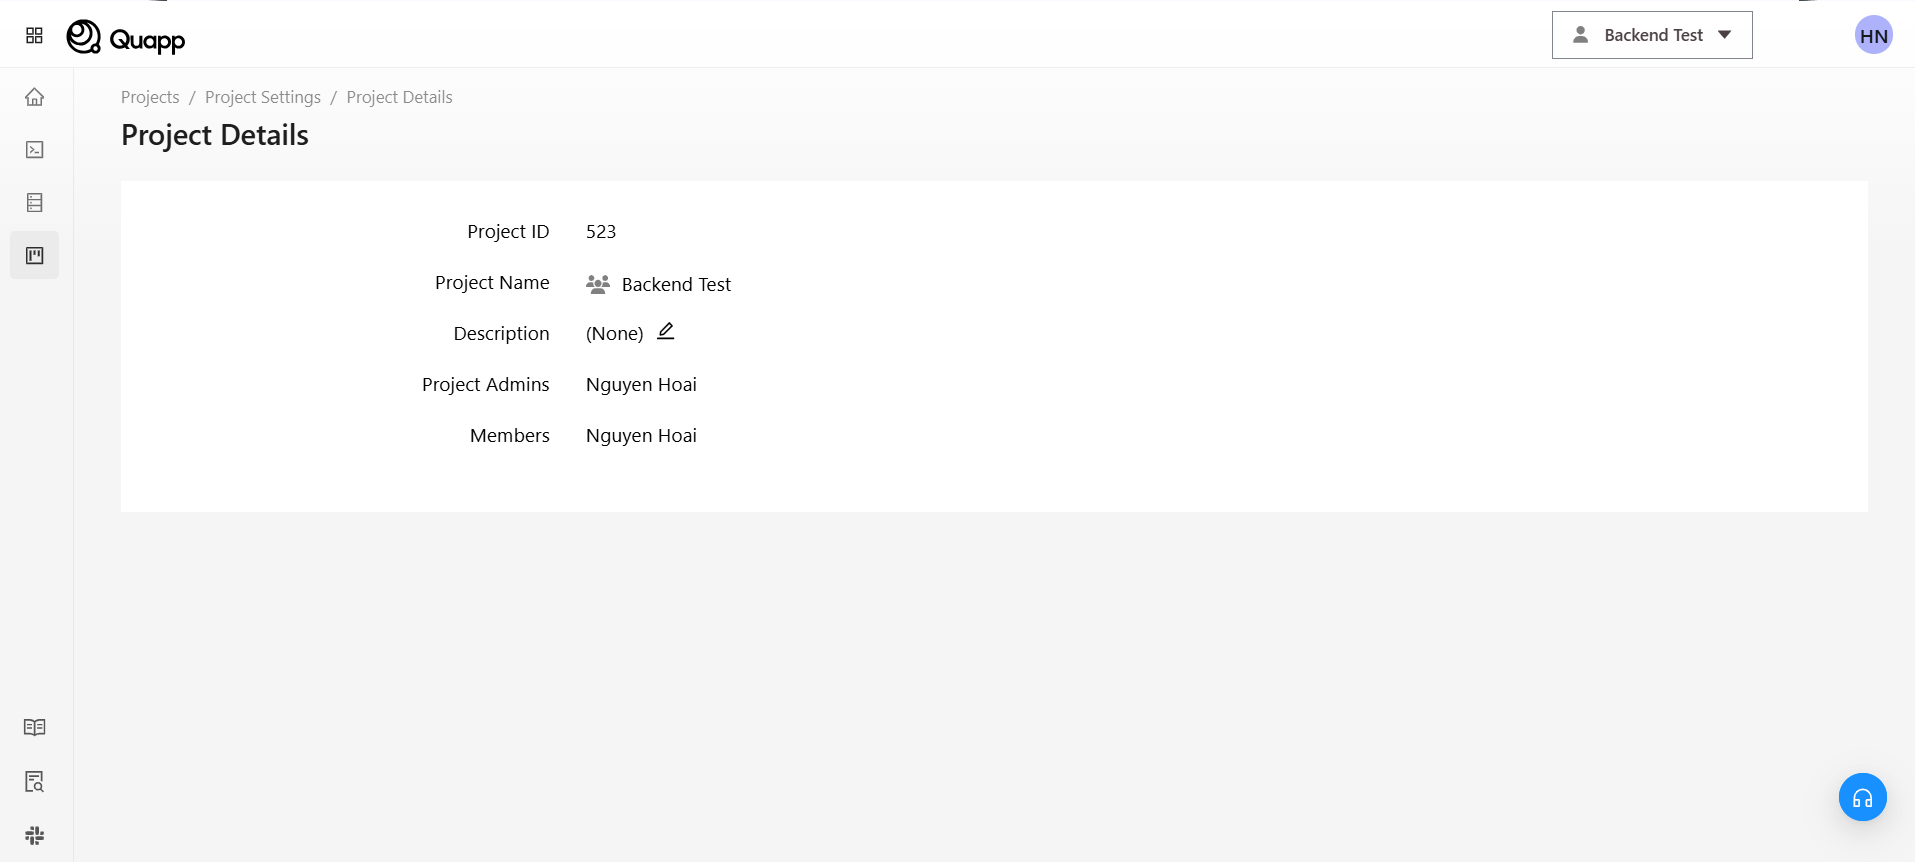
1. Project Name
This is the name of the project. It may be a code name or an identifier for the project.
2. Description
The description section simply repeats the project name. It might be better to provide a more detailed explanation to clarify the project's goals or scope.
3. Admin
The admin is responsible for managing the project, members, and settings.
4. Member
Members participate in assigned tasks, perform specific work, and communicate with the administrator.
Project Quota
The Project Quota feature allows users to:
・View current quota limits for their project
・Monitor usage
・Request quota increases when needed
This helps ensure your project runs smoothly without hitting usage limits.
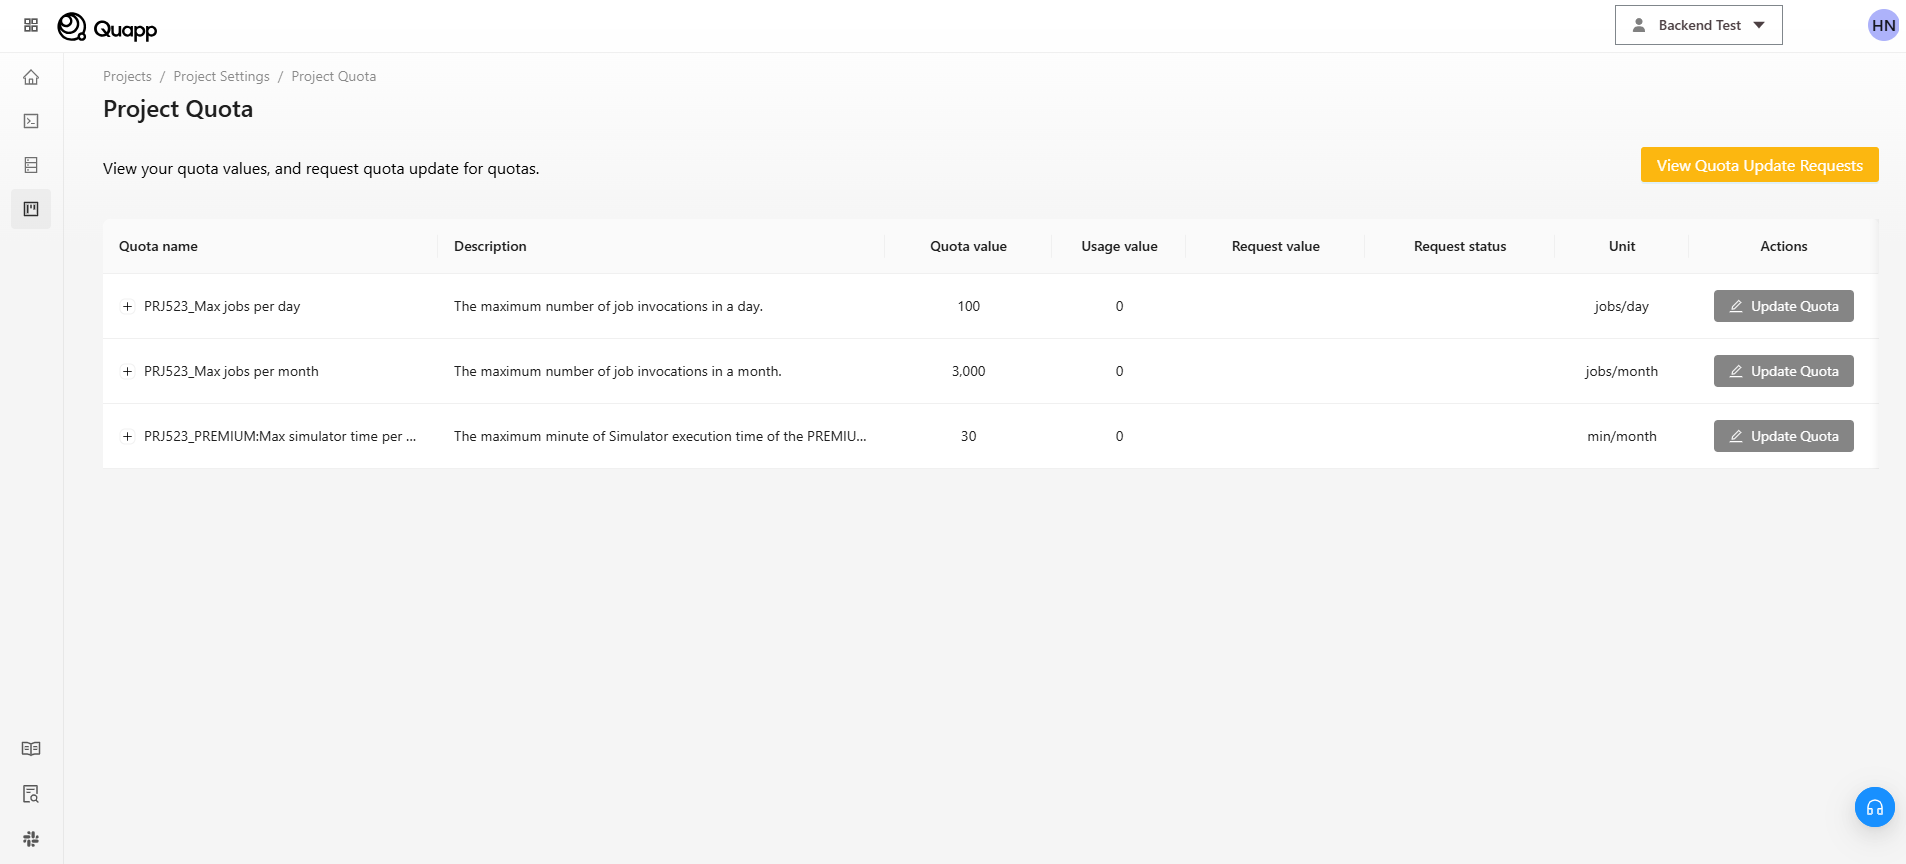
- Quota name: Type of resource (e.g., jobs per day, jobs per month)
- Description: Explanation of the quota
- Quota value: Maximum allowed limit
- Usage value: Current usage
- Unit: Measurement unit (e.g., jobs/day, min/month)
If you need a higher limit, you can submit a request:
Step 1: Open Request Form
Click “Update Quota” next to the quota you want to increase.
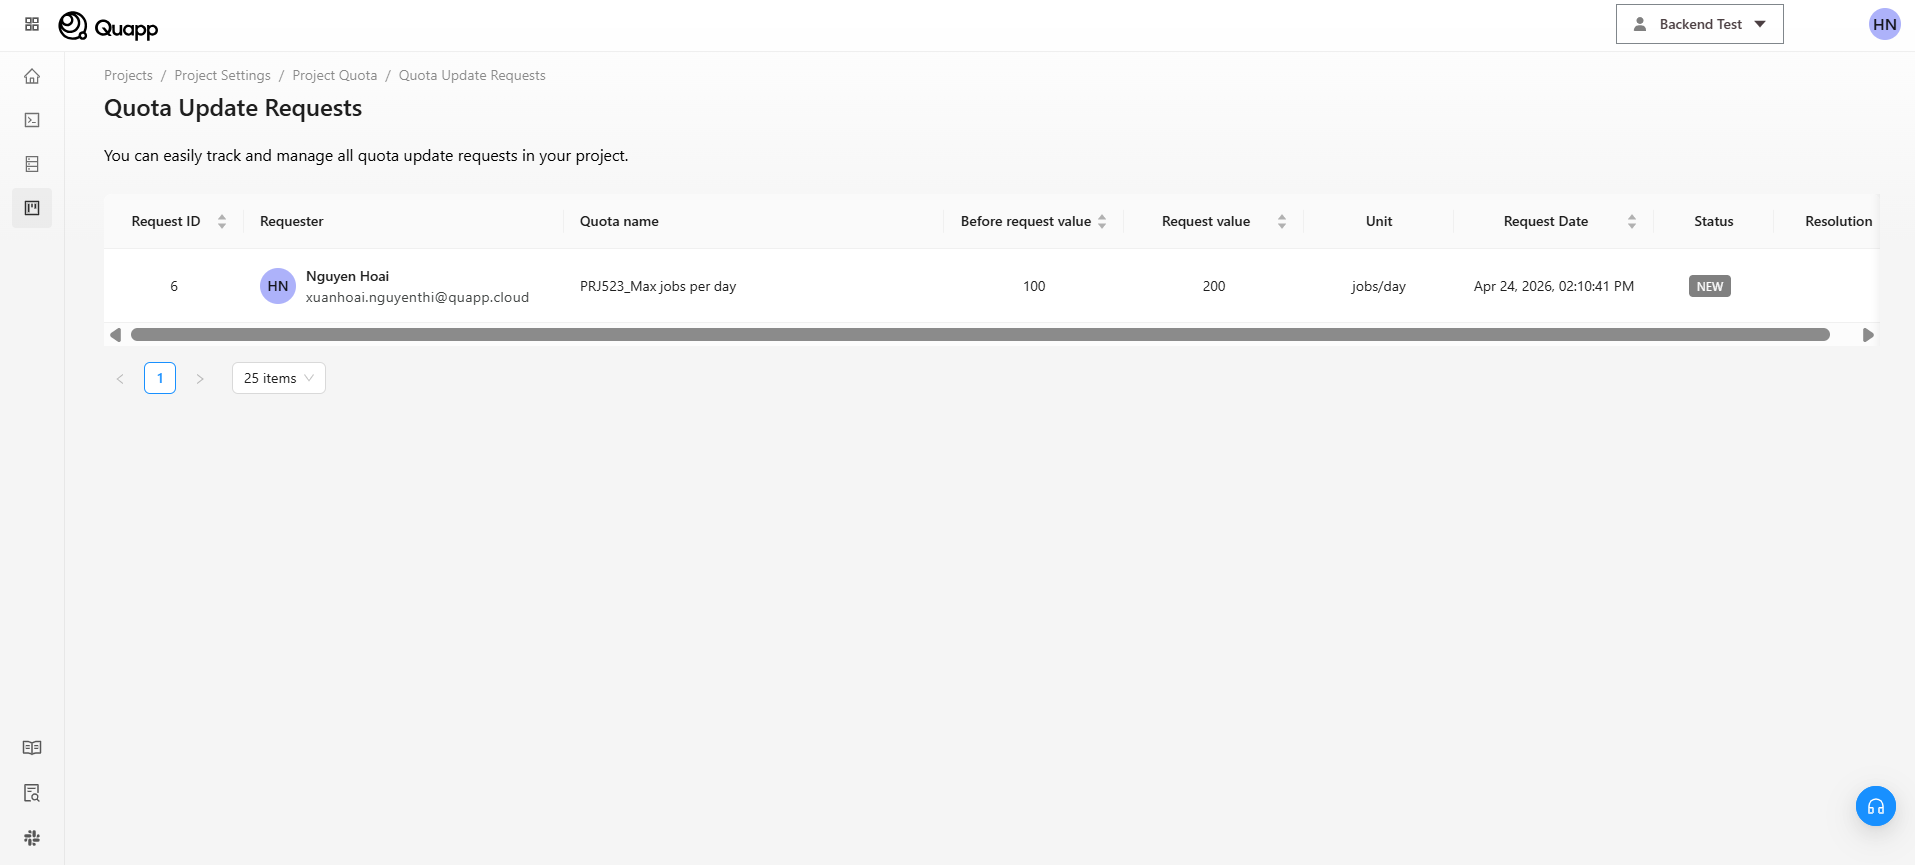
Step 2: Enter Request Details
A popup will appear. Fill in the following:
・Request quota value
→ Enter the new limit you want
・Reason for update
→ Provide a clear reason (e.g., increased workload, testing needs)
Step 3: Submit Request
Click “Request” to submit Or click “Cancel” to discard
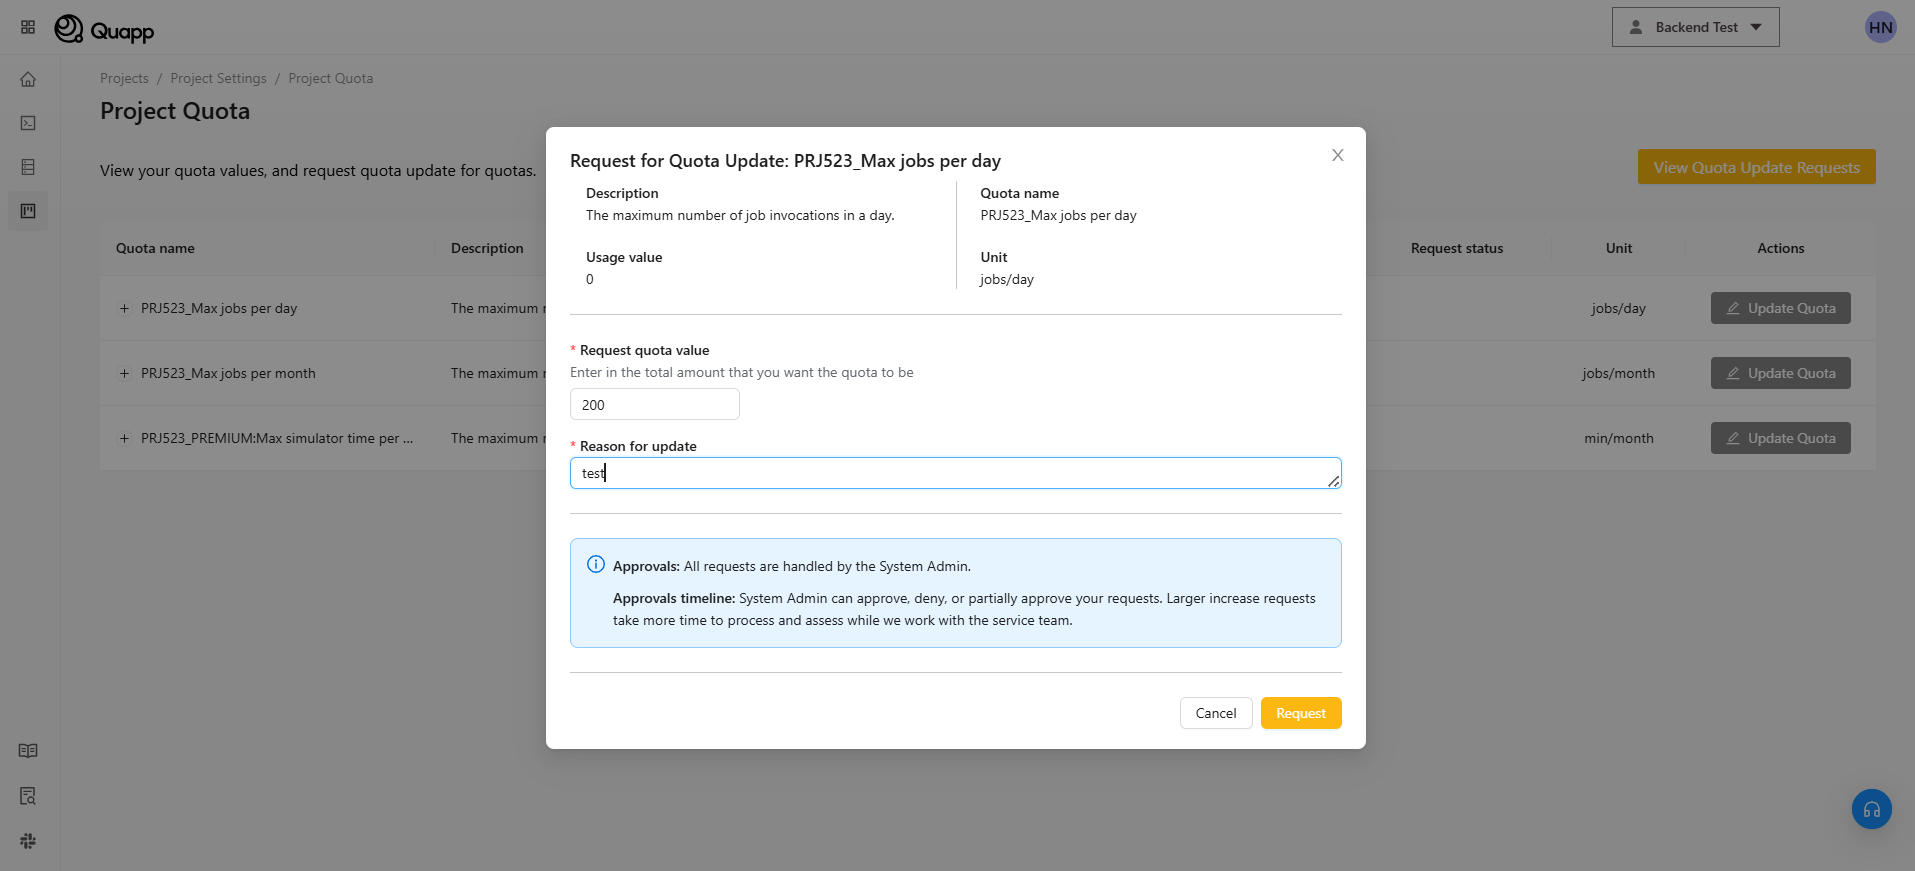
To track your requests:
Click “View Quota Update Requests”
You will see a list with:
・Request ID
・Requester
・Quota name
・Before / Requested value
・Status (e.g., NEW, Approved)
・Request date
This helps you monitor progress and status of your requests.
📌 Note on Approval
・All requests are reviewed by the System Admin.
・Requests may be: Fully approved, Rejected
Delete a Project (Send Project to Recycle Bin)
⚠️ Deleting a project removes every function and every job inside it. The project itself goes to the Recycle Bin, where an administrator can restore it for 30 days. After that window it is deleted permanently and cannot be recovered by anyone.
Before you delete
- Make sure no one else is still using the project.
- Export or note down any job results you need to keep.
- Treat the 30 days as the whole of your safety margin. The Auto-delete in column of the Recycle Bin shows how long each project has left.
Steps
- Open Project Settings and select Send project to Recycle Bin.
- A warning page appears: "Sending this project to the Recycle Bin immediately removes all functions and jobs in the project. A project can only be recovered from the Recycle Bin by an administrator."
- Select Send this project to Recycle Bin.
- A confirmation dialog opens. Follow its prompts to confirm, or cancel to keep the project.
After deletion
- All functions and jobs that belonged to the project are removed.
- The project moves to the Recycle Bin, where an administrator can restore it for 30 days.
- If you deleted your active project, the application redirects you to the Choose Your Project page. You must select another project before you can continue working.
The Recycle Bin
Open All projects and select Recycle Bin (next to Create Project). The page lists every deleted project:
| Column | Meaning |
|---|---|
| Project Name | The project that was deleted |
| Deleted By | The user who deleted it |
| Auto-delete in | Days left before the project is permanently deleted. Shows Soon when little time remains; hover to see the exact date |
| Actions | More Actions opens the menu below |
From More Actions you can:
- Restore — bring the project back. Only an administrator can recover a project from the Recycle Bin. A "Project restored" message confirms it.
- Delete permanently — remove the project for good, after a confirmation. A "Project permanently deleted" message confirms it. This cannot be undone.
This is a change from earlier behaviour. Project deletion used to be immediate and permanent, recoverable only by a System Admin. Since the 17/09/2026 release it is a 30-day soft delete, and the screens were renamed from "trash" to "Recycle Bin".