Invite the user to the workspace
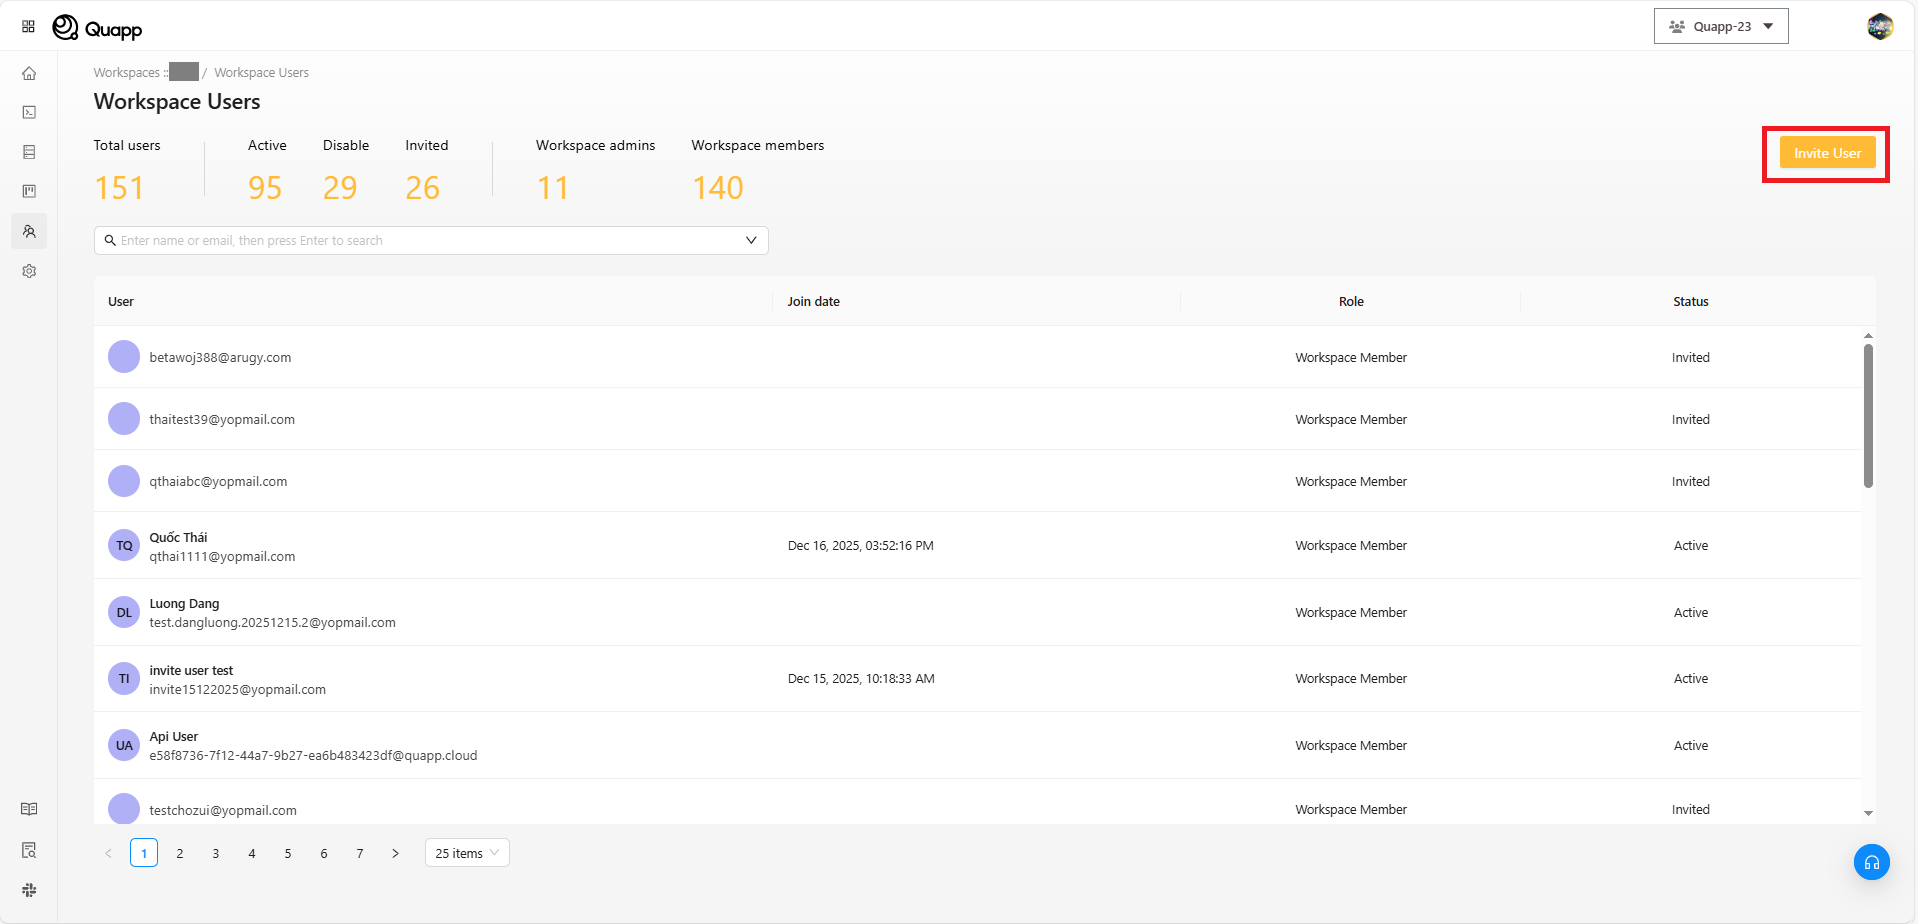
1. Access Workspace User Settings
- Log in as the Workspace Admin.
- Navigate to Workspace Settings → select Users.
2. Begin the User Invitation Process
- On the Users screen, click “Invite User”
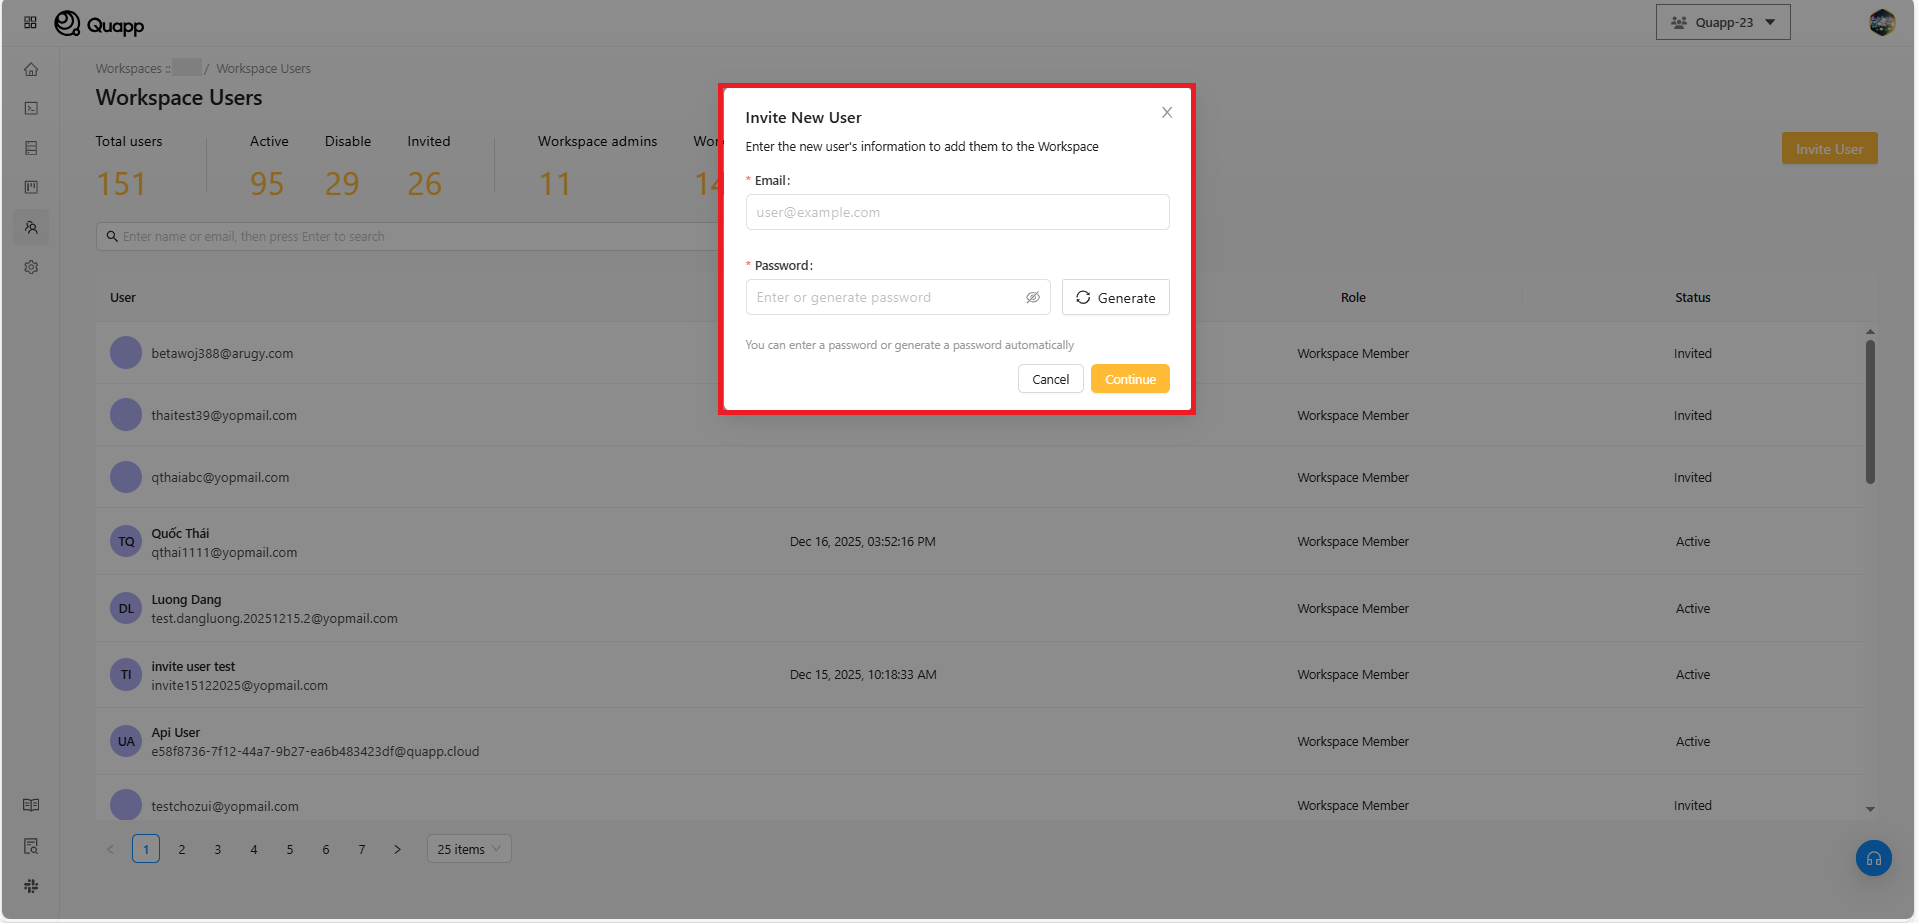
3. Fill in the Invitation Details
- The “Invite New User” window will appear.
- Enter the user’s email and password.
- You may click “Generate” to automatically create a password.
- After completing the required fields, click “Continue.”
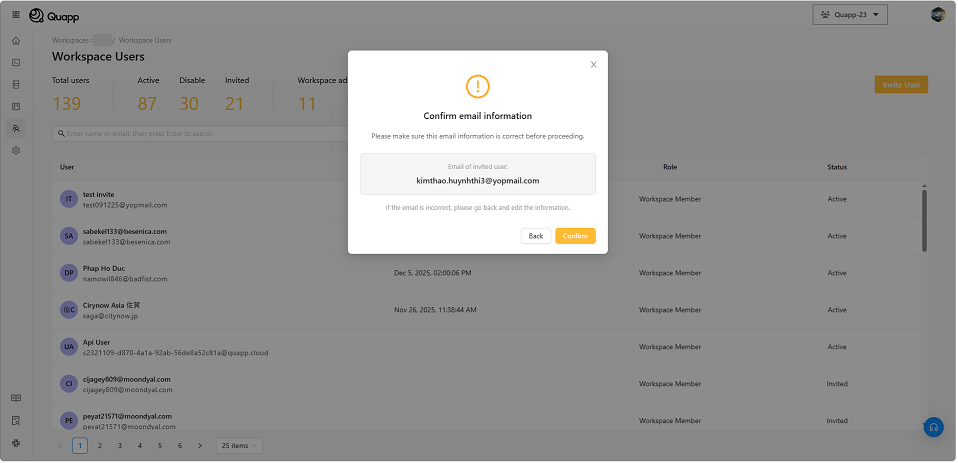
4. Confirm the User’s Email
- The system will display a “Confirm email information” screen.
- Verify the email is correct and click “Confirm.”
Possible Outcomes:
-
If the user already exists on Quapp: The system displays: “User already exists.”
-
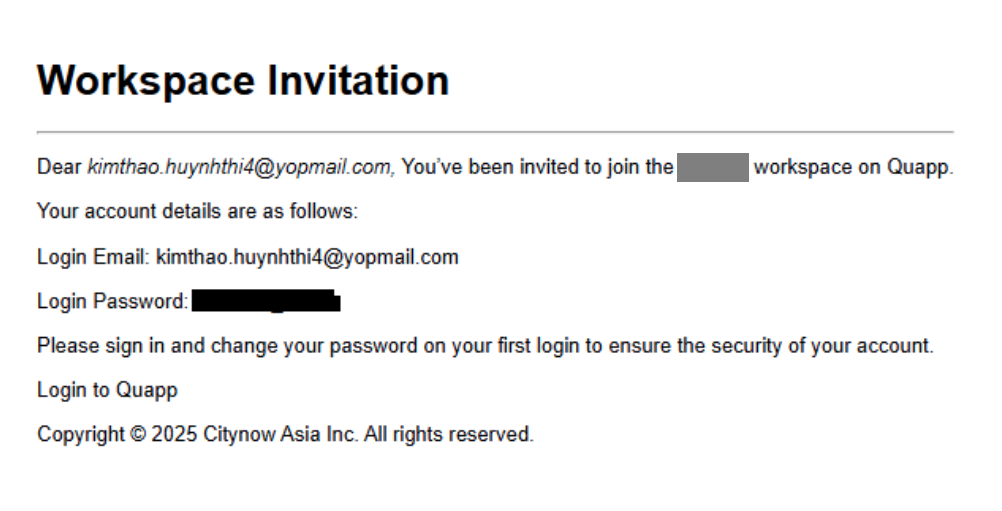
If the user does not exist on Quapp: The system creates a new account and displays: “Account created successfully.”. An email will be sent to the user containing:
- Their login email
- Their password
- The login link
5. Select a Payment Plan
After confirming the email, the system will display the Select Payment Plan screen. The Workspace Admin can choose one of the following:
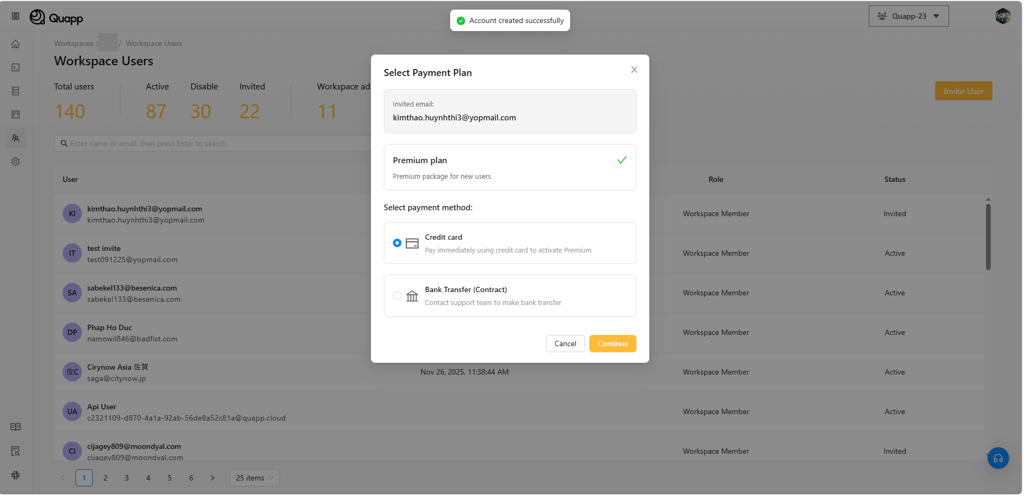
Option A: Credit Card
-
Purchase a Premium plan on behalf of the user.
-
The AI Assistant can be purchased as an individual add-on when inviting a user.
To enable this option:
- Select the AI Assistant add-on during the plan selection step.
- The add-on will be applied to the invited user upon completion.
Workspace Admins can enable this based on the user’s needs.
Option B: Bank Transfer (Contract)
- Send a request to the System Admin to issue a contract for the user.
Option A: If “Credit Card” Is Selected
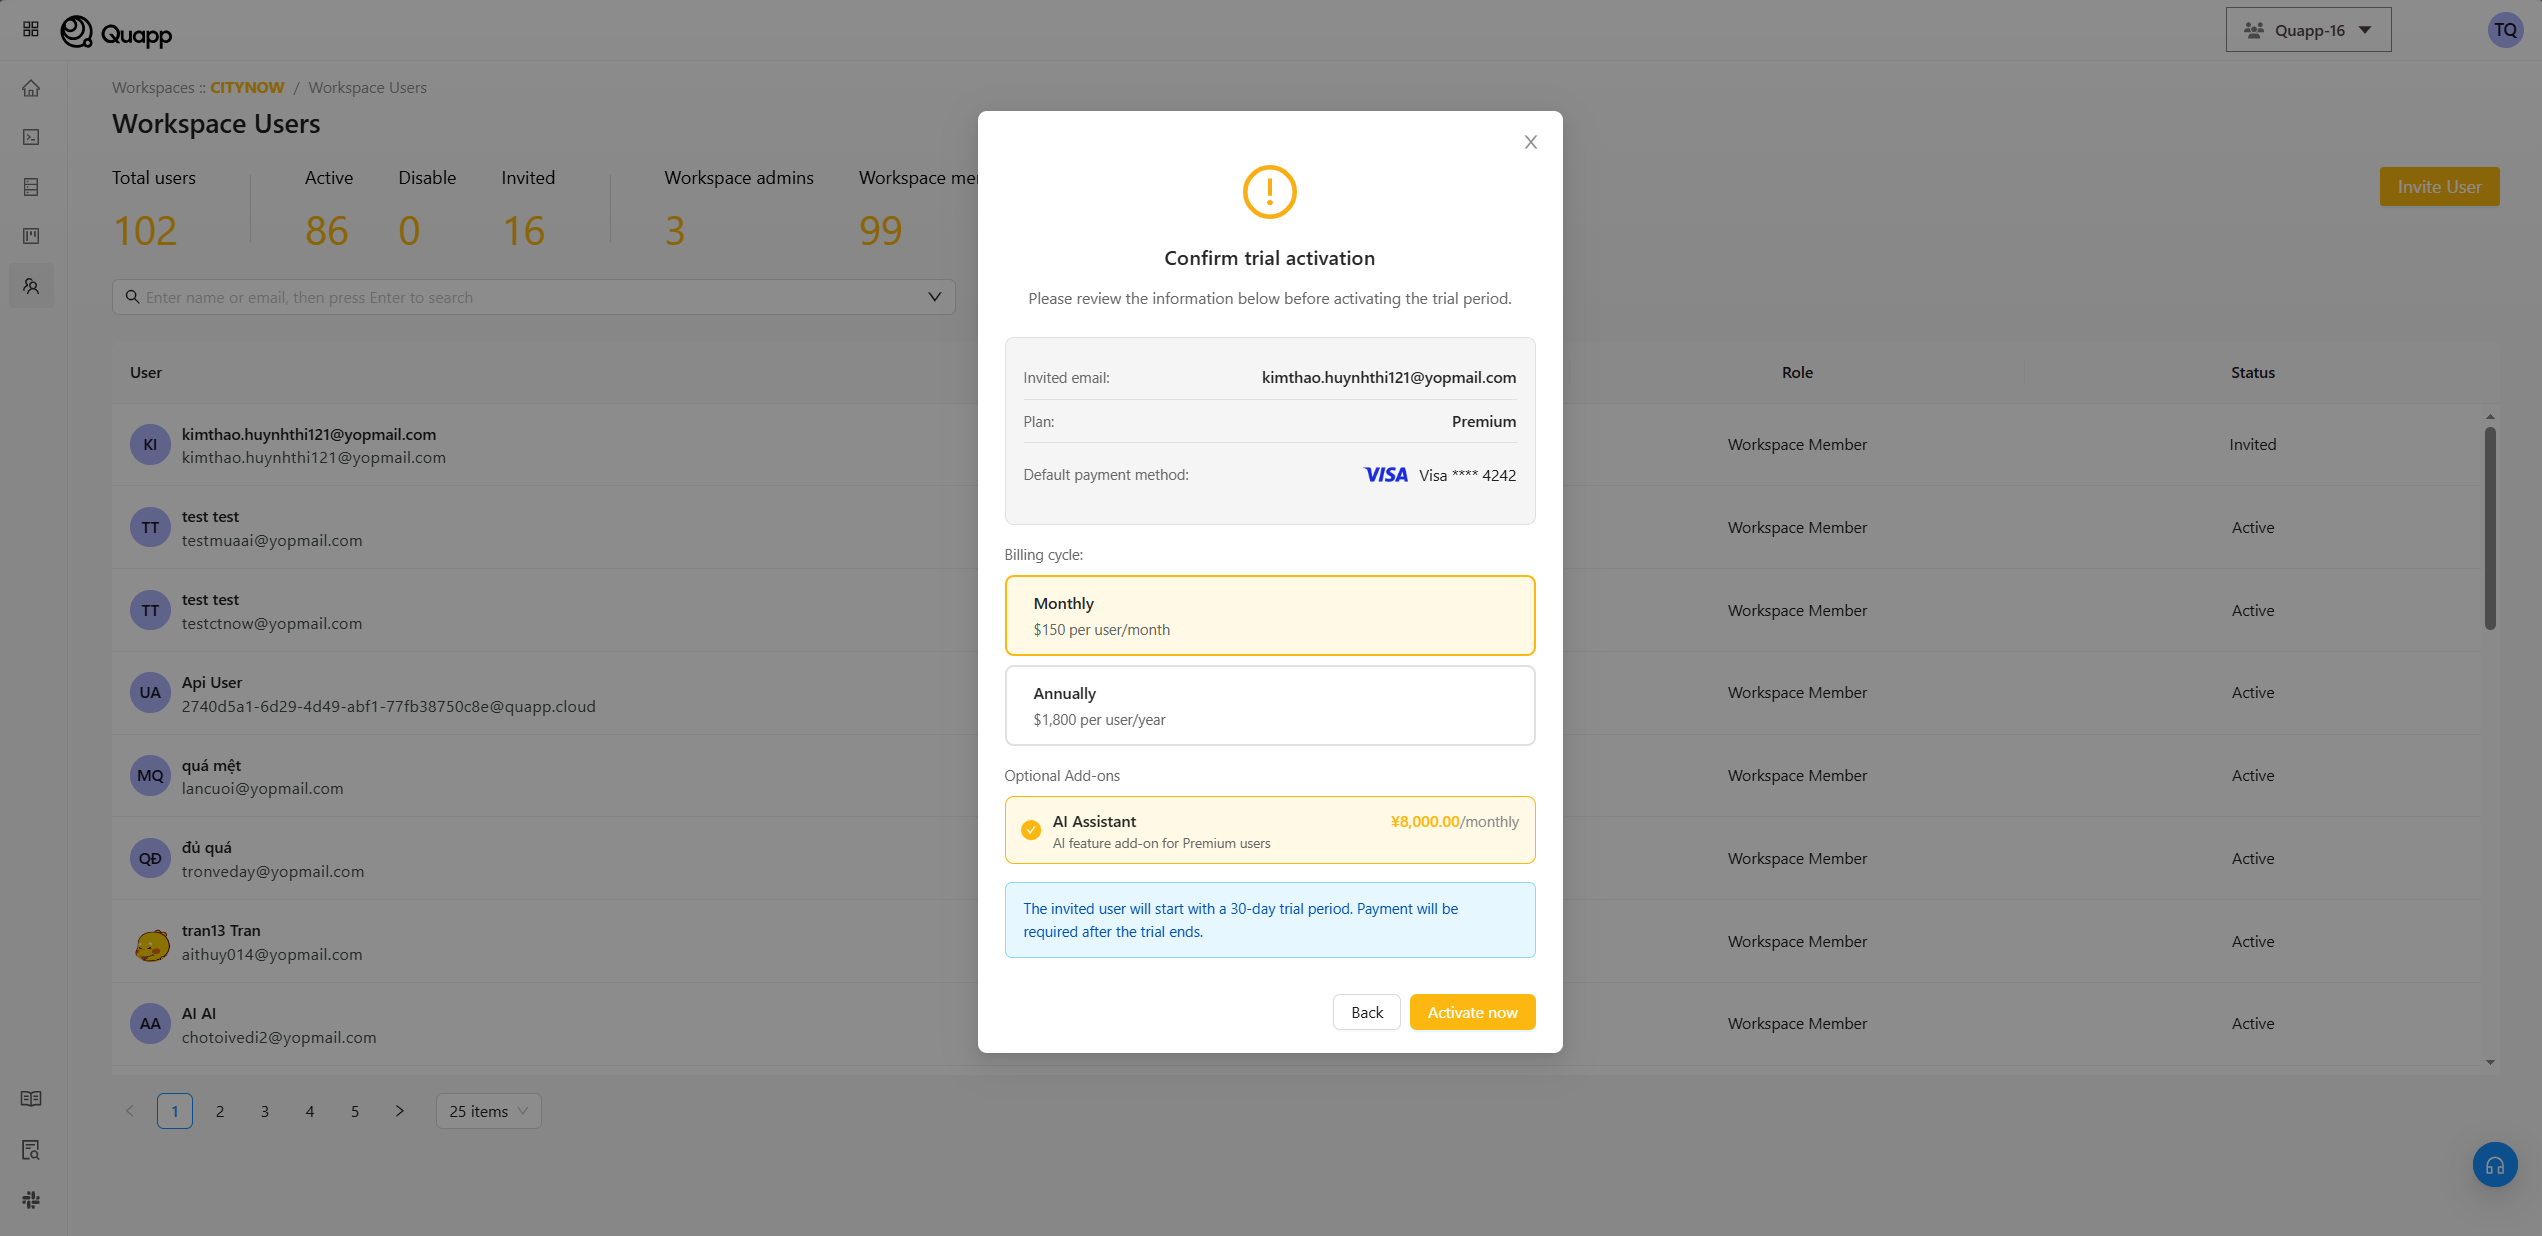
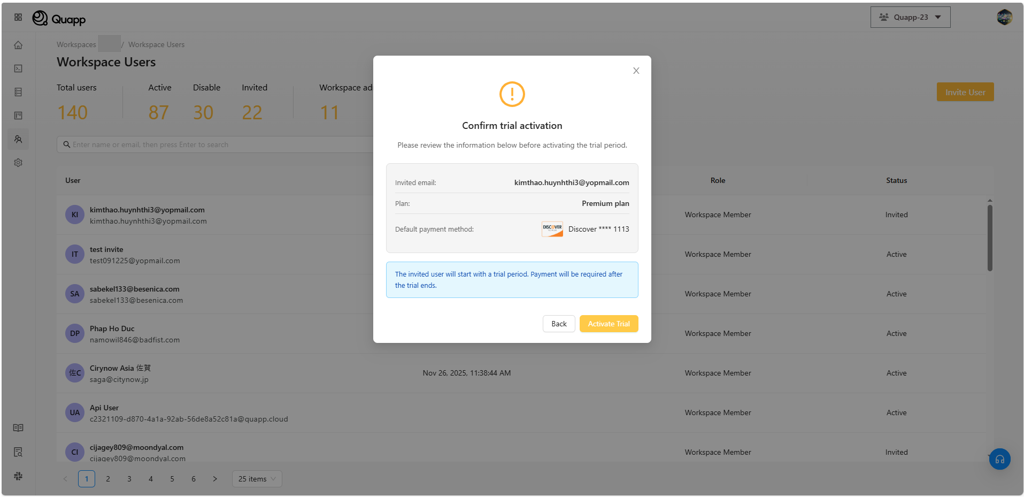
6. Confirm Trial Activation
The system shows a “Confirm trial activation” modal containing:
- Selected plan
- Default payment method
→ Click “Activate trial.”
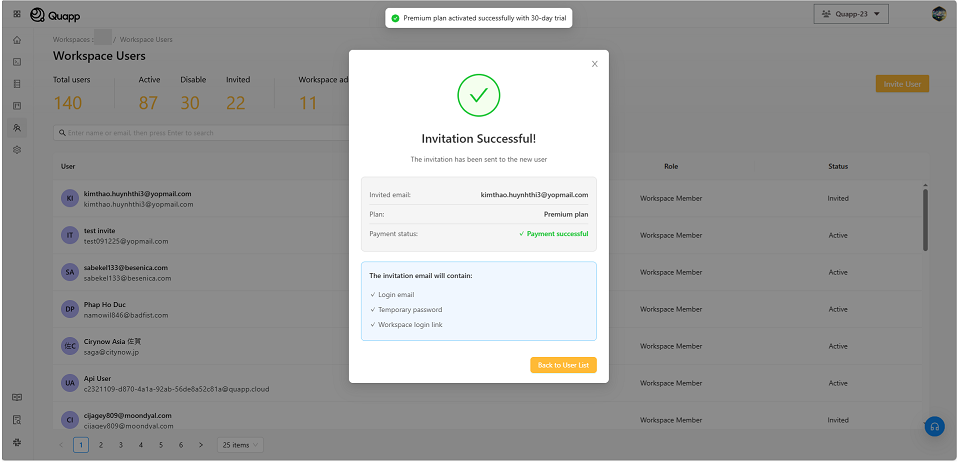
7. Complete the Invitation
- The system processes the Premium payment.
- The “Invitation Successful!” modal appears.
- Click “Back to User List.”
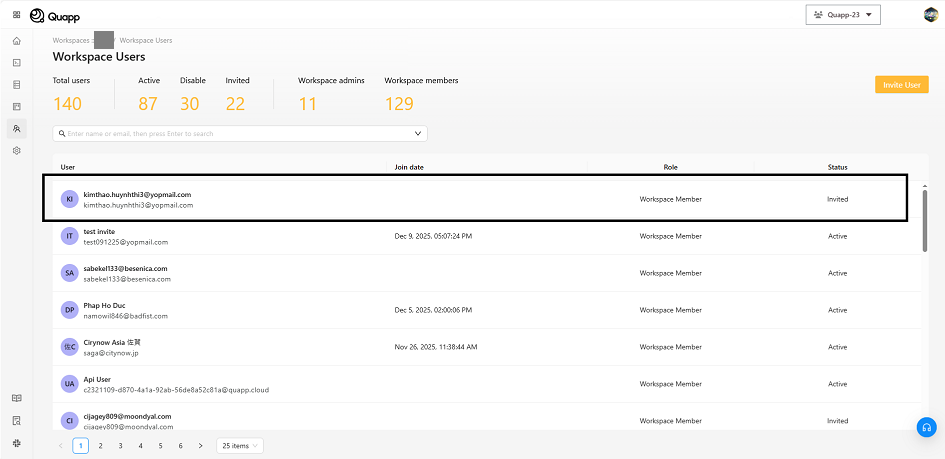
A new user with status: Invited will now appear in the user list.
Option B: If “Bank Transfer (Contract)” Is Selected
6. Contact Support
- The system displays a “Contact Support for Contract” modal with support contact information. => Please contact us via email for support.
- Click “I understand�” to finish the process.
